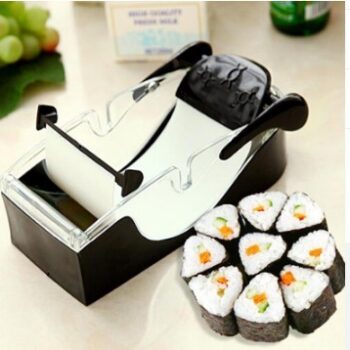
Sushi for Beginners: Crafting Your First Homemade Rolls
Sushi has evolved into a global culinary sensation, captivating taste buds worldwide. While readily available in restaurants, there’s a distinctive joy in creating your rolls at home. Not only does it allow for ingredient customization, but the process also transforms into a fun and rewarding culinary adventure. In this detailed guide, we will explore the art of making your first homemade sushi rolls, filling the gaps for a more comprehensive experience.
Introduction
Sushi, originating from Japan, has become a beloved global delight. Beyond its availability in restaurants, crafting sushi at home offers a unique and fulfilling experience. Understanding the cultural and historical context behind sushi adds depth to the joy of its creation.
How To Create Sushi At Home
The journey from desiring sushi to savoring it involves several crucial steps. To embark on your sushi-making adventure, start with understanding the ingredients, tools, and equipment necessary for the process.
1. Sushi Ingredients
The foundation of an exceptional sushi roll lies in its ingredients. Let’s delve into the essential components for your first homemade rolls:
- Rice: Opt for short-grain rice, specifically sushi rice, prized for its sticky texture.
- Nori (Seaweed Sheets): Obtain these from local grocery stores, as nori is indispensable for wrapping your sushi rolls.
- Fresh Fish or Vegetables: Choose high-quality, fresh ingredients. For those preferring a vegetarian option, vegetables like cucumber, avocado, and carrots work splendidly.
- Soy Sauce, Wasabi, and Pickled Ginger: These traditional accompaniments elevate the sushi-eating experience.
- Sushi Rice Vinegar: An integral element, sushi rice vinegar provides the characteristic flavor to the rice.
2. Tools and Equipment For Sushi Preparation
Ensuring you have the right tools will streamline the sushi-making process. Here’s a breakdown of essential equipment:
- Bamboo Sushi Rolling Mat: This indispensable tool aids in tightly rolling the sushi.
- Sharp Knife: A well-sharpened knife is crucial for cleanly slicing through the rolls.
- Rice Cooker or Pot: Achieve perfectly cooked rice using a dedicated rice cooker or a pot on the stove.
- Bowl for Mixing Rice Vinegar: Choose a non-metallic bowl for mixing sushi rice vinegar with the cooked rice.
3. Preparing Sushi Rice
Mastering sushi rice preparation involves selecting the right type of rice and executing precise steps:
A. Selecting the Right Type of Rice
For optimal results, opt for short-grain rice renowned for its sticky texture, aiding in roll cohesion.
B. Washing and Rinsing the Rice
Rinse the rice under cold water until the water runs clear, eliminating excess starch that could make the rice overly sticky.
C. Cooking the Rice
Follow the instructions on the rice package or your rice cooker. Once cooked, transfer the rice to a non-metallic bowl.
D. Seasoning the Rice with Sushi Rice Vinegar
While the rice is still warm, gently fold in sushi rice vinegar. This step not only adds flavor but also imparts the characteristic sushi taste to the rice.
4. Choosing and Preparing Fillings
Customizing your sushi rolls involves selecting and preparing a variety of fillings:
A. Traditional Options
- Raw Fish (Sashimi-grade): Opt for fish labeled as sashimi-grade, indicating its safety for raw consumption.
- Vegetables: Popular choices include cucumber, avocado, and carrots. Slice them thinly for easy rolling.
B. Cooked Options
- Cooked Shrimp: Pre-cook shrimp to introduce a succulent, cooked element to your rolls.
- Grilled Chicken or Beef: For those inclined towards cooked proteins, grilled chicken or beef serves as delightful alternatives.
C. Preparing and Cutting the Fillings
Once you’ve selected your ingredients, preparation involves cutting them into thin strips, ensuring seamless rolling.
5. Assembling Sushi Rolls
The heart of sushi-making lies in the meticulous assembly of rolls. Let’s explore this step-by-step:
A. How to Use the Bamboo Rolling Mat
Place a sheet of nori on the bamboo rolling mat with the shiny side down. Wet your hands to prevent rice from sticking and spread a thin layer of rice evenly over the nori, leaving a small border at the top.
B. Placing and Arranging the Fillings
Arrange your chosen fillings horizontally in the center of the rice-covered nori sheet.
C. Rolling the Sushi Tightly
Using the bamboo mat as a guide, roll the sushi tightly from the bottom, applying gentle pressure. Seal the edge with water to secure the roll.
D. Sealing the Roll with Water
Dip your finger in water and run it along the exposed edge of the nori to seal the roll.
6. Cutting and Presentation
Mastering the art of cutting and presenting your sushi enhances the overall dining experience:
A. Using a Sharp Knife to Cut the Rolls
Use a sharp knife to cut the roll into bite-sized pieces. Wet the knife with water between cuts to ensure clean slices.
B. Presentation Tips for a Visually Appealing Dish
Arranging the sushi pieces on a plate should be approached with an aesthetic mindset. Consider adding wasabi and pickled ginger as garnishes for a visually pleasing presentation.
C. Garnishing with Soy Sauce, Wasabi, and Pickled Ginger
Serve your homemade sushi with soy sauce for dipping, a dollop of wasabi for heat, and pickled ginger to cleanse the palate between bites.
Troubleshooting Tips when Making Sushi
Navigating common pitfalls in sushi-making is essential for a seamless experience:
A. Common Mistakes and How to Avoid Them
- Overfilling the Roll: Keep fillings minimal to prevent the roll from becoming too large and difficult to handle.
- Not Rolling Tightly Enough: Ensure a tight roll to prevent it from falling apart when sliced.
B. Adjusting Rice Quantity and Roll Tightness
Experiment with the amount of rice and tightness of the roll to find the perfect balance for your preferences.
Conclusion
Embarking on the journey of making sushi at home may seem daunting initially, but armed with the right ingredients, tools, and a bit of practice, you’ll soon create rolls that rival your favorite sushi joint. Embrace experimentation with different fillings and techniques, and most importantly, savor the joy that comes with the process.


Leave a comment